

Automotive Window Film Removal: A Step-by-Step DIY Guide
Old window tint has a way of telling you it is finished. The edges bubble, the colour fades toward purple, and at night the haze makes it harder to see your mirrors. Once it reaches that point, no cleaner will save it. The only fix is to take the film off and start again.
Automotive window film removal is a job a patient person can do in an afternoon with ordinary tools. The catch is the rear window: those thin lines across the back glass are the defroster grid, and one careless scrape with a razor can kill a line for good.
First, Figure Out What Film You’re Dealing With
Knowing what is on your glass tells you how much patience the job will need.
Dyed film: the purple, bubbly kind
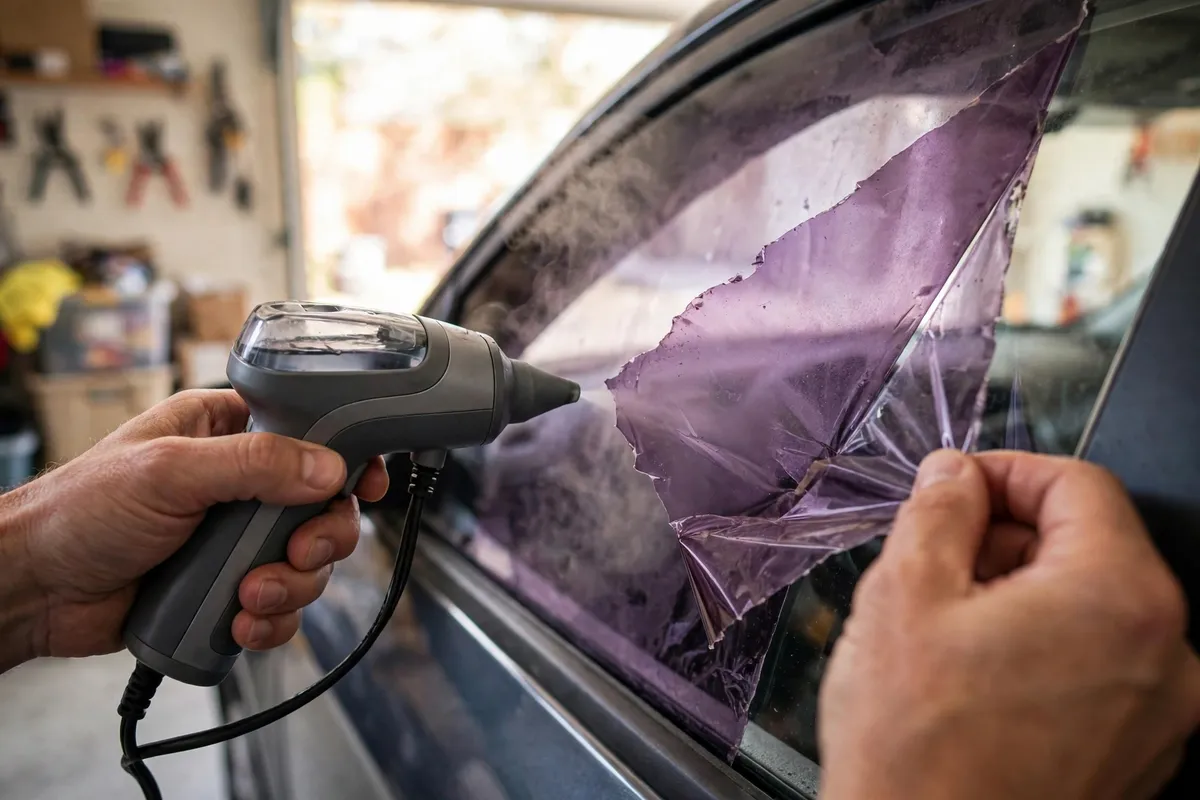
This is the cheap film, and the most common reason people remove tint. The dye breaks down in the sun, the colour drifts toward purple, and the adhesive gives up in patches — that is where the bubbles come from. Dyed film usually tears into pieces as you peel it and leaves the most glue behind.
Metallic and ceramic film: tougher to lift
Higher-end films hold their colour and their grip. They tend to come off in larger sheets — until you meet the adhesive, which can leave a thin, stubborn layer that needs soaking and a second pass. The stiffer film also fights you more on curved glass.
Factory-tinted glass is not film at all
Some cars leave the factory with the colour baked into the glass itself. There is no film to peel and no removal method applies. If you cannot find an edge to lift at any corner, you are probably looking at factory-tinted glass. Leave it alone.
What You’ll Need
- A heat source: a fabric steamer (fastest), a heat gun on low or medium, or a hair dryer for small jobs
- A fresh single-edge razor blade in a holder, plus plastic razor blades for the rear window
- A spray bottle of soapy water and adhesive remover made for automotive glass
- Black trash bags and masking tape, for the sun method
- Microfiber towels, paper towels, and old towels to protect the seats and door panels
- Nitrile gloves and eye protection if you use ammonia
Pick a mild day or work in a garage with the door open. Work one window at a time — the same one-area-at-a-time approach that works when decluttering a whole house keeps a fiddly job from turning into a mess.
How Long Does It Take?
Give yourself a relaxed afternoon for a full car. The peeling is the quick part — cleaning the glue off afterwards usually takes longer.
| Job | First-timer | With practice |
|---|---|---|
| One side window | 30–60 minutes | 20–30 minutes |
| Rear window (with defroster) | 60–90 minutes | 45–60 minutes |
| Full car, all windows | 2–4 hours | 1–2 hours |
Old, brittle film adds time at every step. If the film flakes instead of peeling, budget an extra hour — and consider handing the rear window to a shop.
The 4 Methods, Compared
Every method is the same idea: soften the adhesive, peel the film, clean the glue. They differ in speed, cost, and risk.
| Method | Speed | Cost | Best for | Watch out for |
|---|---|---|---|---|
| Steamer | Fastest | $30–$60 if you buy one | Most cars, all windows | Steam burns; keep hands clear |
| Heat gun / hair dryer | Fast | Free if you own one | Side windows, small jobs | Too much heat in one spot can stress the glass |
| Ammonia + black bag in the sun | Slow (1–2 hours of soaking) | A few dollars | No-tool jobs, hot sunny days | Fumes; never mix ammonia with bleach |
| Soak and peel (Gila method) | Medium (30 min soak per window) | $10–$25 for remover | Old, brittle film | Needs patience; several rounds on old film |
If you only buy one tool, make it a steamer: the moist heat loosens the adhesive and the film comes off in bigger pieces, leaving less glue behind.
Method 1: Steamer — the Fastest Way
Steam the glass inside and out
Hold the steamer a few inches from the glass and work across the window in slow, overlapping passes. The film should feel warm and start to lift at a corner.
Peel low and slow, steaming ahead of the peel
Ease up a corner with a fingernail or a plastic razor blade, then pull the film back close to the glass at a low angle, steaming the section just ahead of where you are peeling. A slow, steady pull is the whole secret: it keeps the film coming off in one piece and pulls more adhesive off with it. If the film tears, steam the next section and start a fresh corner. Some adhesive will stay on the glass — that is normal, and it is a separate step covered below.
Method 2: Heat Gun or Hair Dryer
Warm a corner, keep the heat moving
Set the heat gun to medium and hold it four to six inches from the glass, sweeping it across one corner for 20 to 30 seconds. A hair dryer works the same way, just more slowly. Never park a heat gun in one spot: concentrated heat can stress the glass, and on a cold day the sudden temperature change can crack it.
Use the right temperature
A specialist heat-gun guide puts the working range at a medium setting, roughly 400°F on the dial, with the adhesive itself letting go at around 150–250°F. The high setting, near 575°F, has no place in this job — it overheats the glass, makes the film brittle, and bakes the adhesive on harder. Lift the warm corner and pull the film back close to the glass. If it starts to tear, add more heat to the next section rather than pulling harder.
Method 3: Ammonia and a Black Trash Bag in the Sun
This is the no-tool method. It costs almost nothing, but it needs a hot, sunny day and a couple of hours.
Bag the outside, spray the inside
Cut a black trash bag to the shape of the window. Spray the outside of the glass with soapy water and press the bag onto it. Then spray the inside film generously with an ammonia-based cleaner, cover it with a second piece of black bag, and tape the edges so it stays sealed.
Let the sun do the work, then peel
Leave the car in the sun for an hour or two. The dark plastic traps heat and moisture against the film, which softens the adhesive. When you peel the bag away, the film often starts to come with it.
Stay safe with ammonia
Ammonia fumes irritate the eyes, nose, and throat, so work with the doors open, wear gloves and eye protection, and never mix ammonia with bleach. The U.S. National Institute for Occupational Safety and Health lists ammonia as an irritant and advises preventing skin and eye contact — its pocket guide entry for ammonia is worth reading first. Fumes build up fast in a closed garage — the same reason a beeping carbon monoxide detector should never be ignored.
Method 4: Soak and Peel, the Way Gila Prints It
Gila, the do-it-yourself film brand owned by Eastman (the company behind LLumar), publishes its own removal sheet for its adhesive remover. It is the most patient method, and the best one for old, brittle film that tears under heat.
Spray, cover, and wait 30 minutes
Spray the remover onto the film, cover it with plastic, and seal the edges with masking tape. After 30 minutes, lift the top edge of the plastic and test with a fingernail whether the film will peel. If it will not, spray again, reseal, and check every 30 minutes. Old film can take a few rounds. Tape the bottom of the window first so the glue you scrape off later does not end up inside the door.
Pull down with both hands, then soak the glue
Slide a razor blade under a top corner, pry up an inch or two, then pull the film downward with both hands. Work slowly — film that tears into strips leaves more glue behind. Then spray the leftover adhesive and let it soak for three to five minutes. Repeat until the glue turns milky white: that is how you know it is ready to come off. Shave it downward with a sharp razor, keeping the glass wet the whole time. Gila says the solution works best when the inside of the glass is between 65 and 75°F, and its sheet is explicit about the wait afterwards: at least 24 hours before new film goes on. The full steps are in Gila’s own window film adhesive remover instructions.
The Rear Window Deserves Its Own Rules
The rear window is where do-it-yourself removals most often go wrong. The defroster grid is printed onto the inside surface of the glass, right where the tint adhesive sits.
Find the grid before you touch anything
Look at the rear glass before you start. Note where the horizontal lines run, where the antenna lines are, and where the wiring tabs sit at the edges. Keep moisture and tools away from those tabs.
Peel along the lines, never across them
The lines run horizontally, so peel the film in the same direction — lifting from a side edge and peeling horizontally is the usual approach. Pulling across the lines is what snaps them. A broken line leaves a cold stripe of glass that never clears.
Plastic tools only, and steam the glue off
No metal razor on the inside of the rear window, ever. Carmakers say the same thing in their own manuals: Ram and Mazda both warn against scrapers and sharp tools on the inside of the rear glass. Use a plastic razor blade or a soft non-scratch pad, and keep every stroke running along the lines. On the rear glass, heat and moisture do the work a blade does elsewhere: steam a section, wipe the softened glue with a paper towel or nylon pad, and repeat. It is slower, and it is the only safe way.
Test the defroster when you’re done
Once the glass is clean, turn the defroster on briefly and watch the whole grid clear evenly. A line that stays cold points to a break. Small breaks can usually be fixed with a conductive defroster repair kit — but it is far better to find out now than on the first frosty morning.
Getting the Glue Off the Glass
Most of the work in a removal is the adhesive, not the film.
Side windows: razor on wet glass
Spray the glue with soapy water or adhesive remover and let it soak. Then shave it downward with a fresh single-edge razor held at a shallow angle, keeping the glass wet the whole time. Wipe the blade on a tissue as it loads up, and switch to a new blade the moment it starts to drag — a nicked edge is what leaves marks. Never scrape dry glass: dust and grit under the blade will scratch it.
Rear window: plastic and patience
Spray the leftover glue and rub it off with paper towels or a non-scratch nylon pad, working parallel to the defroster lines in short, light strokes. No razor, no steel wool, no abrasive pads on this glass.
Stubborn spots: let the remover do the work
For glue that will not move, wipe on a small amount of automotive-safe adhesive remover, wait the time the label recommends, and wipe the softened glue away with a microfiber towel. Extra-fine (0000) steel wool with plenty of soapy water can polish the last residue off plain side glass — but keep it far away from the rear window and any coated glass. When in doubt, skip it: a plastic blade and a second soak will get you there.
What Does Professional Removal Cost?
Prices vary by city and by how bad the film is, but 2026 U.S. guides report a fairly tight range.
| Job | Typical shop price |
|---|---|
| One side window | $25–$60 |
| Rear window (with defroster) | $75–$200 |
| Full car, all windows | $120–$300 |
| Sedan, full removal | $50–$150 |
| SUV or crossover, full removal | $100–$180 |
| DIY supplies (if you own no tools) | $10–$50 |
Those ranges come from TintLaws’ 2026 U.S. shop pricing guide, and they line up with the prices tracked by ThePricer, which also lists current advertised rates — Turbo Tint locations charging about $24 for one window, $99 for rear glass, and $189 for a full vehicle. Old, bubbled, or layered film pushes the price up, and a difficult full-car job can reach $300–$450. Always confirm whether the quote includes the glue cleanup — a cheap quote that skips the adhesive is not a bargain.
When to Pay a Shop Instead
You got a fix-it ticket
If the police ticketed your tint, removal is usually the fix — and a shop receipt makes the correction easier to prove. In California, for example, front side windows can only carry clear film that lets through 88% of light on its own. Read the ticket: not every tint violation can be corrected the same way.
It’s a leased car or a new car
A scratched window or a dead defroster line on a lease return costs far more than a professional removal.
The rear film is brittle and flaking
When the rear film comes off in flakes instead of sheets, or the glass is already half film and half glue, a shop with a steamer will finish in a fraction of the time — and without the risk to the grid. A pro finishes a full car in one to two hours.
After the Film Is Gone
With the glass clean, inspect it in daylight from inside and outside. Look for fine scratches, leftover adhesive spots, and gaps in the defroster pattern.
If you plan to re-tint, wait at least 24 hours before the new film goes on — that is Gila’s number, and it gives the glass time to dry fully. When the new film is on, leave the windows up for a few days while it cures; a little haziness or a few tiny water pockets are normal and clear as it dries. Clean it afterwards with a microfiber towel and an ammonia-free glass cleaner, and be gentle around the edges and the defroster grid.
Removing old tint rewards patience more than strength. Soften the adhesive first, peel low and slow, keep the blade off the defroster lines, and clean the glue properly. Do that, and the glass comes out clear with the defroster still working.
Can I remove window tint with a hair dryer?
Yes. A hair dryer warms the film enough to soften the adhesive, though it works more slowly than a heat gun or steamer. Keep the heat moving and warm the area just ahead of where you are peeling.
Will removing tint damage my rear defroster?
It can if you scrape it. Never use a metal razor on glass with defroster lines. Peel along the lines, use steam to soften the glue, and clean it off with a plastic blade or a non-scratch pad. Test the defroster when you finish.
How long does it take to remove tint from a whole car?
Plan on 2–4 hours for a first-timer, including the glue cleanup, which usually takes longer than the peeling. One side window takes 30–60 minutes; the rear window takes 60–90 minutes.
How much does it cost to have window tint removed professionally?
Typical U.S. shop prices in 2026: $25–$60 for one side window, $75–$200 for a rear window with defroster lines, and $120–$300 for a full car. DIY supplies cost $10–$50 if you own no tools.
How long should I wait before putting new tint on?
At least 24 hours after removing the old film, according to Gila’s removal instructions. That gives the glass time to dry fully before the new film goes on.
