
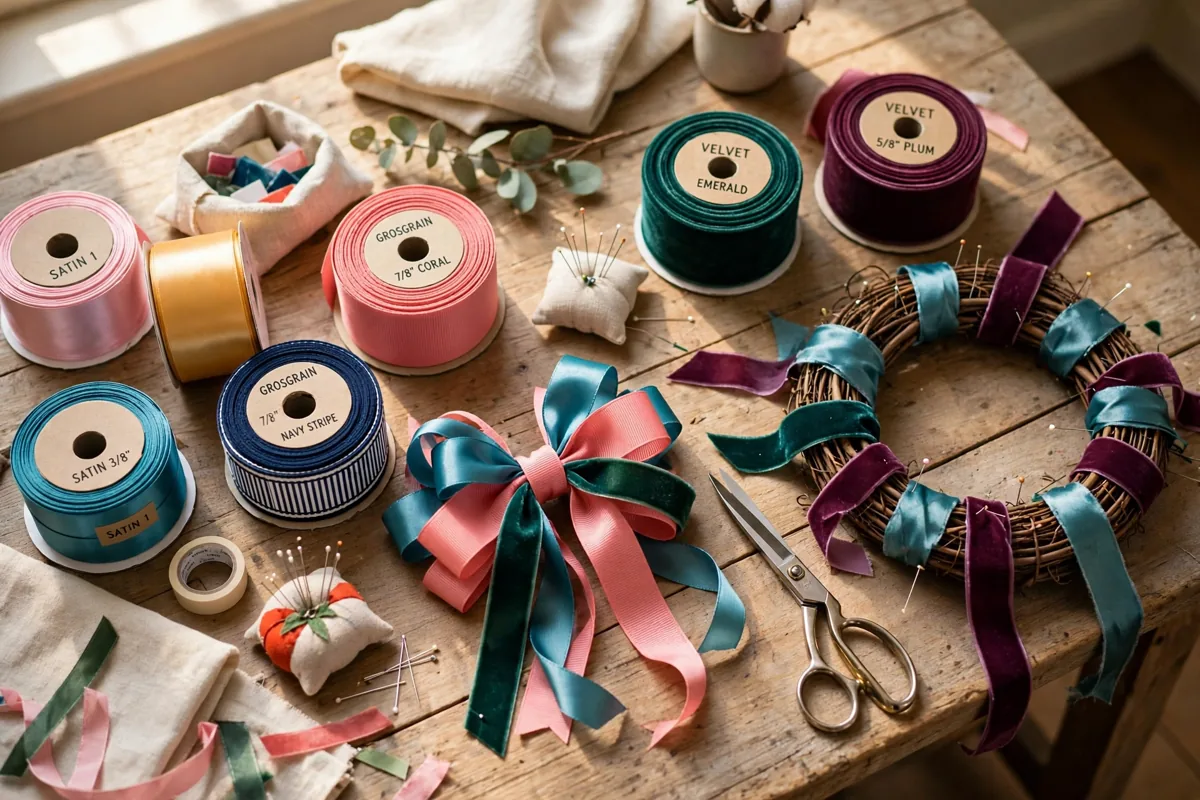

Ribbon is the easiest craft supply to fall in love with. It costs very little, it comes in every colour you can think of, and you can turn a single spool into something pretty in under half an hour. You do not need a sewing machine. You do not need years of practice. A pair of scissors, a bit of glue, and a spare evening are enough to start.
That is what makes ribbon crafts such a good first project. The material forgives mistakes. A crooked cut disappears inside a bow. A knot that will not sit flat becomes a flower. And when a project works, you have something real to show for it — a wreath on the door, a bookmark in your book, a gift that looks like it came from a shop.
This guide keeps things simple. First, which ribbon to buy and why. Then ten easy ribbon crafts you can make at home, each with real steps, a time estimate, and a rough cost. Then the small skills that make everything look better: stopping frayed ends, crafting safely with kids, and using up the scraps.
What You Need to Start Ribbon Crafts
Most ribbon crafts use the same short list of supplies. Buy these once and you can make nearly every project in this guide.
- Ribbon in three widths. A narrow spool (3/8 inch) for bows and wrapping, a medium spool (5/8 to 7/8 inch) for most projects, and one wide spool (1.5 inches) for wreaths and big bows.
- Sharp fabric scissors. Blunt scissors chew ribbon edges and cause fraying. Keep one pair just for ribbon and fabric.
- A hot glue gun and glue sticks. Low-temperature glue is safer for kids and fine for most ribbon work. Standard glue guns hold better on wood and metal.
- Clear craft glue or a glue stick. For paper, cards, and anything you do not want to heat.
- Wire cutters. Only if you use wired ribbon — regular scissors will blunt on the wire.
- A ruler and a pencil. Measuring twice is the difference between a bow that looks full and one that looks thin.
- Pins, a needle, and thread. A few hand stitches hold better than glue on anything that gets handled a lot, like a headband.
That is the whole kit. If you already craft, you probably own most of it. If you are starting from scratch, a few spools of ribbon and a glue gun cost less than a takeaway dinner. For more beginner-friendly projects to build your confidence, see our easy acrylic painting ideas for beginners — they use the same low-pressure, learn-by-doing approach.
Which Ribbon Works Best for Which Project
Not all ribbon behaves the same way. Picking the wrong type is the most common reason a project looks flat. Here is the short version of what each type does best.
| Ribbon type | Feels like | Best for | Watch out for |
|---|---|---|---|
| Satin | Smooth and shiny | Gift bows, flowers, wrapping | Slippery knots; frays fast |
| Grosgrain | Ribbed and firm | Headbands, bookmarks, bows that must hold shape | Less drape; stiff in wide widths |
| Wired edge | Stiff edges, holds shape | Wreaths, big bows, garlands | Wire pokes out when cut; trim it back |
| Velvet | Soft and plush | Holiday decor, hair bows, gift wrap | Shows creases; crushes under weight |
| Burlap | Rough and rustic | Rustic wreaths, table runners, farmhouse decor | Sheds fibres; frays a lot |
| Organza | Sheer and light | Layering over satin, party decor, gift baskets | Very slippery; needs glue or stitches |
Satin ribbon
Satin is the classic. It shines, it drapes, and it makes the prettiest bows. It is also slippery, so knots loosen unless you add a dot of glue or a stitch. Use it where looks matter most: gift wrap, flowers, and anything decorative. Seal the cut ends (see the fraying section below) or they will unravel in a day.
Grosgrain ribbon
Grosgrain has fine ribs running across it. That texture gives it grip, so knots stay put and bows keep their shape. It is the best ribbon for beginners and the best choice for anything you wear or handle often — headbands, bookmarks, keychains. If you buy only one type, buy grosgrain.
Wired-edge ribbon
A thin wire runs along each edge of this ribbon. Bend it and it stays bent. That makes it the right pick for wreaths, swags, and big statement bows that need to hold their loops open. Cut it with wire cutters, not your good scissors, and fold the wire ends under so they cannot poke out.
Velvet ribbon
Velvet feels expensive because it is. It adds depth and warmth, especially in autumn and winter colours. Use it for holiday projects, hair bows, and wrapping special gifts. Store it flat — folded velvet keeps creases.
Burlap and organza ribbon
Burlap suits rustic and farmhouse looks. It frays heavily, so it works best on projects where a rough edge is part of the charm. Organza is sheer and floaty. On its own it can look thin, but layered over satin it adds a soft glow. Both are cheap, so they are good for practising before you cut into the good ribbon.
If you want a deeper look at how texture and width change a finished project, the craft ribbon guide at Best Buy explains it clearly. And if you enjoy making supplies yourself, you can even make your own fabric ribbon from scrap cloth — a good way to use up old T-shirts and fabric offcuts.
10 Easy Ribbon Crafts You Can Make at Home
Each project below lists the time it takes, what it costs in materials, and how hard it is. Start with project one. It teaches the bow, and the bow shows up in almost everything else.
1. The Classic Layered Gift Bow
Time: 15 minutes · Cost: under $2 · Difficulty: easy · Best ribbon: satin or grosgrain, 1 inch wide
Cut three lengths of ribbon: 18 inches, 14 inches, and 10 inches. Fold each one into a loop and pinch the centre. Stack the loops from largest to smallest, then tie them together in the middle with a thin piece of ribbon or thread. Fan the loops out until the bow looks full. Cut two tails, about 8 inches each, and glue them behind the bow. Trim the tail ends in a V shape. That is it. This bow works on gifts, wreaths, and hair clips. Make it once and you will never buy a stick-on bow again.
2. Velvet Bookmark With a Charm
Time: 10 minutes · Cost: under $2 · Difficulty: easy · Best ribbon: velvet or grosgrain, 5/8 inch wide
Cut a 12-inch piece of ribbon. Fold the top inch over and stitch or glue it into a small loop. Thread a key ring or a small charm through the loop. Seal the bottom end so it cannot fray, then cut it into a V or a point. It takes ten minutes, it costs almost nothing, and it makes a genuinely good gift for a reader.
3. Ribbon-Wrapped Wreath
Time: 45 minutes · Cost: $5–$10 · Difficulty: easy · Best ribbon: wired edge, 1.5 inches wide
Start with a plain grapevine or foam wreath form. Anchor the end of your ribbon to the back with a pin or a dab of hot glue. Wrap the ribbon around the form, overlapping each pass by about half the ribbon’s width so no base shows through. Keep the tension even — too tight and the ribbon puckers, too loose and it sags. When you reach the start again, tuck the end under and glue it. Add a layered bow from project one at the top or bottom. Change the colours and the same wreath works for every season. For autumn, try the same approach with a pumpkin theme — our pumpkin painting ideas pair well with a ribbon-wrapped wreath on the front door.
4. No-Sew Ribbon Headband
Time: 20 minutes · Cost: under $3 · Difficulty: easy · Best ribbon: grosgrain, 5/8 inch wide
Buy a plain plastic or metal headband. Cut a piece of ribbon about 2 inches longer than the headband. Glue one end to the inside of the headband tip, then wrap the ribbon around the band in a tight spiral, overlapping slightly each time. Glue the other end underneath. Add a small bow at the side if you like. Grosgrain grips the band best and will not slide around in your hair. A few hand stitches at each end make it last longer than glue alone.
5. Ribbon Flower Brooch
Time: 25 minutes · Cost: under $3 · Difficulty: medium · Best ribbon: satin, 1 inch wide
Cut five pieces of ribbon, each about 6 inches long. Fold each piece in half to make a loop, then glue or stitch the two ends together — that is one petal. Arrange the five petals in a circle on a small felt disc and glue them down. Add a button or a bead in the centre. Glue a brooch pin to the back of the felt. It looks far harder than it is, and it turns a plain coat or bag into something personal.
6. Ribbon Tassel Keychain
Time: 15 minutes · Cost: under $2 · Difficulty: easy · Best ribbon: satin or organza, any width
Cut about fifteen pieces of ribbon, each 6 inches long. Lay them in a neat stack. Tie the stack tightly in the middle with a short piece of ribbon, then fold the stack in half at the tie. Wrap another piece of ribbon around the fold, about half an inch from the top, and knot it. That wrap forms the tassel head. Trim the ends level. Thread the top loop onto a key ring. Use up your shortest scraps here — odd lengths and mixed colours look good in a tassel.
7. Ribbon-Wrapped Photo Frame
Time: 30 minutes · Cost: $3–$5 · Difficulty: easy · Best ribbon: grosgrain or velvet, 5/8 inch wide
Take a plain wooden frame and wrap it the same way as the wreath: anchor the ribbon at a corner, wrap with a slight overlap, and glue the end at the back. Mitre the corners by folding the ribbon at a neat angle instead of bunching it. If the frame is bare wood, paint it first and let it dry fully — our guide to sealing acrylic paint on wood will help the finish last. A ribbon-wrapped frame turns a cheap frame into a keepsake, and it takes less time than a trip to the shops.
8. Ribbon Garland (Bunting)
Time: 30 minutes · Cost: under $5 · Difficulty: easy · Best ribbon: mixed scraps, any type
Cut a length of cord or thick ribbon for the base — as long as the space you want to decorate. Cut your coloured ribbons into strips about 10 inches long. Fold each strip in half over the cord and pull the two ends through the loop. That is a lark’s head knot, and it holds without glue. Slide the strips close together and keep going until the cord is full. Hang it over a doorway, a mantel, or a party table. This is the best project for using up a scrap bag, and children can do the knotting themselves.
9. Ribbon-Wrapped Vase
Time: 20 minutes · Cost: under $4 · Difficulty: easy · Best ribbon: velvet or burlap, 1 inch wide
Pick a plain glass jar or vase. Starting at the bottom, wrap ribbon around it in a spiral, gluing every few turns so it cannot slip. Or wrap two or three separate bands with gaps of bare glass between them — that looks cleaner and uses less ribbon. Tie a small bow where the ends meet. A wrapped jam jar with a candle inside makes a lovely table centrepiece, and the ribbon peels off later if you want the jar back.
10. Braided Ribbon Friendship Bracelet
Time: 20 minutes · Cost: under $1 · Difficulty: easy · Best ribbon: satin, 1/4 inch wide, three colours
Cut three pieces of thin satin ribbon, each about 14 inches long. Knot them together at one end and tape the knot to a table. Braid them the way you would braid hair: right over middle, left over middle, repeat. Keep the tension even and the braid will lie flat. When it fits around your wrist, knot the end and trim the tails. Add a bead or two if you like. It is the simplest project on this list, and it is the one kids ask to make again.
How to Stop Ribbon From Fraying
Cut ribbon unravels. The loose threads at a cut end will creep further every time the ribbon is handled. Three fixes work, and which one you pick depends on the ribbon.
Heat sealing is fastest. Hold the cut end near a lighter flame for a second — close enough to melt the edge, not so close that it catches. This only works on synthetic ribbon like polyester satin and grosgrain. It does not work on cotton, silk, or velvet, which will scorch. Work in a ventilated spot and keep the flame away from the rest of the spool.
Fray Check is a clear liquid you paint onto the cut edge. It dries clear and stiff, and it works on every ribbon type, including natural fibres. It costs a few dollars a bottle and lasts for years. Apply it thinly and let it dry flat.
Pinking shears cut a zigzag edge that slows fraying but does not stop it. Use them when the edge will be hidden inside a project, or as a quick fix when you have nothing else. For anything that will be handled a lot — a bookmark, a keychain — use heat sealing or Fray Check instead.
One more habit helps: cut ribbon with sharp scissors in a single clean motion. A ragged cut frays faster than a clean one, whatever you do next.
Ribbon Crafts With Kids
Ribbon is a kind craft for children. It is soft, it comes in bright colours, and mistakes do not matter. A few ground rules keep it fun.
Give younger children blunt-tip scissors and pre-cut ribbon lengths. Let them do the tying, knotting, and gluing with a glue stick — save the hot glue gun for an adult. Low-temperature glue guns are a good middle ground for older children, with an adult nearby. Keep small beads, buttons, and charms away from children under three. And pick projects where the child does the real work: the garland, the braided bracelet, and the tassel keychain are all genuinely child-friendly.
Crafting together is also a quiet way to build fine motor skills. Tying knots, threading ribbon, and folding bows all use the same small hand movements children need for writing. You do not need to say any of that out loud. Just make something together.
What to Do With Leftover Ribbon Scraps
Every crafter ends up with a bag of short pieces too good to throw away. Use them.
- Gift wrapping. Tie two or three short pieces together for a layered bow, or use a single strip as a napkin ring.
- Bookmarks. Any piece over 8 inches long is a bookmark waiting to happen.
- Tassels and garlands. Short pieces are perfect for both — see projects six and eight above.
- Card making. A strip of ribbon across a handmade card looks better than most shop-bought designs.
- Plant ties. Soft ribbon ties up tomato stems and climbing plants without cutting into them.
- Scrap bows. Glue short pieces into tiny bows and keep a jar of them for last-minute gifts.
If you want still more ideas, the 30-plus ribbon craft roundup at DIY Candy is a good place to browse — it links out to full tutorials for wreaths, jewellery, wall hangings, and more.
How to Store Ribbon So It Stays Neat
Ribbon tangles fast and creases easily, so storage matters more than it seems. Keep spools on a dowel or a tension rod inside a cupboard — you can pull what you need without unravelling the rest. Store velvet flat, never folded tight, or it will keep the crease. Keep scraps sorted by colour in small zip bags or jam jars, so you can see what you have at a glance. And keep ribbon away from direct sunlight. Strong sun fades satin and weakens the fibres over time.
A tidy ribbon stash is also a cheaper one. When you can see what you own, you stop buying duplicates.
Ribbon crafts ask very little of you: a few dollars, an evening, and a willingness to make something imperfect. Start with the bow. Then pick one project from the list and make it tonight. By the time you finish, you will know which ribbon you like working with — and you will have something pretty to show for an hour well spent.
What is the best ribbon for beginners?
Grosgrain. Its ribbed texture grips well, so knots stay put and bows hold their shape, and it works for almost every beginner project — headbands, bookmarks, keychains and gift bows. If you buy only one type of ribbon, buy grosgrain.
How do you stop ribbon from fraying?
Three ways work. Heat-seal the cut end with a lighter flame for a second — this only works on synthetic ribbon like polyester satin and grosgrain. Paint Fray Check onto the edge — it works on every ribbon type, including cotton and velvet. Or cut with pinking shears for a zigzag edge that slows fraying, though it will not stop it completely.
What ribbon is best for a wreath?
Wired-edge ribbon, about 1.5 inches wide. The thin wire along each edge lets the ribbon hold its shape, so loops stay open and the wreath looks full. Cut it with wire cutters, not scissors, and fold the wire ends under so they cannot poke out.
Can kids make ribbon crafts?
Yes. Ribbon is soft, colourful and forgiving, which makes it a good craft for children. Give younger children blunt-tip scissors and pre-cut lengths, let them tie and knot with a glue stick, and save the hot glue gun for an adult. The garland, the braided bracelet and the tassel keychain are the most child-friendly projects in this guide.
What can I do with leftover ribbon scraps?
Plenty. Short pieces work as gift-wrap bows, bookmarks, tassels, garland strips, card decorations and soft plant ties. Any piece over 8 inches long makes a bookmark, and mixed-colour scraps look good in tassels and garlands. Keep scraps sorted by colour in small bags or jars so you can see what you have.
